From both a work and a research perspective, it is clear how fundamental graph data is: from disease detection, genetics, and healthcare to banking and engineering, graphs are emerging as a powerful analysis paradigm for hard problems. Neo4j gives developers and data scientists the most trusted and advanced tools to quickly build today’s intelligent applications and machine learning workflows. And the great thing is that it is (almost) free.
Neo4j relies on the Cypher query language (open source). Cypher allows users to store and retrieve data from the graph database. Cypher’s LOAD CSV is great for importing small datasets into our running database. Nevertheless, dealing with big data can be pretty tedious (if not ludicrously slow). To initialize an unused database with large amounts of data from CSV files we need to use the neo4j-admin command.
Neo4j Admin is the primary tool for managing your Neo4j instance. It is a command-line tool that is installed as part of the product and can be executed with several commands. Here, we show how to set up a Neo4j server via a Docker image on a local machine, first importing large datasets into a brand-new graph database and then running the server in a self-hosted fashion. And again, all this for free.
Contents
- The NorthWind dataset
- Prepare your CSV data
- The Neo4j Docker Image
- Import data
- Launch the server
- Upgrade to Neo4j Enterprise & Bloom
The NorthWind dataset
Before loading our CSV data into our server, we have to convert it into a Neo4j-compliant fashion. Here, we will be using the NorthWind dataset, a commonly used SQL dataset. This data depicts a product sales system—storing and tracking customers, products, customer orders, warehouse stock, shipping, suppliers, and even employees and their sales territories:
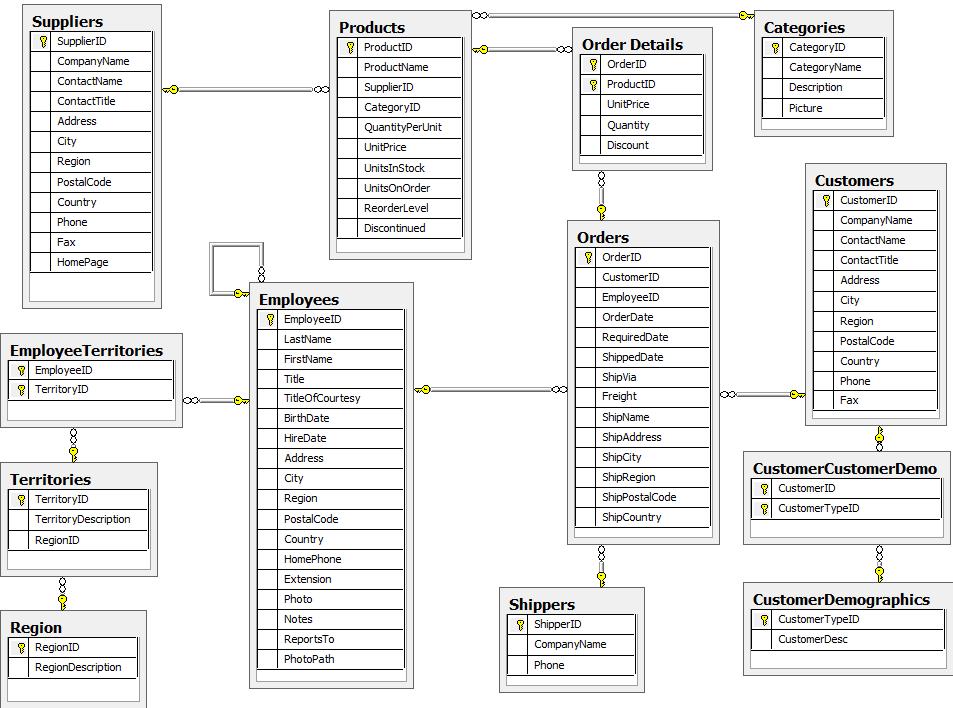
Although the NorthWind dataset is often used to demonstrate SQL and relational databases, the data can also be structured as a graph:

The main differences between the Graph Model and the Relational Model are the following:
| Relational Model | Graph Model |
|---|---|
null values allowed | No null value allowed |
| Less detailed and clear (e.g. to model sales, we need an Orders-to-Employees foreign key relationship) | More detailed and clear (e.g., we know that an employee SOLD an order) |
| Faster for unconnected data | Faster for connected data |
| Query latency proportional to the amount of data stored (“join bomb”) | Query latency proportional to how much of the graph you choose to explore in a query |
We have the orders.csv file:
| OrderID | CustomerID | EmployeeID | OrderDate | RequiredDate | ShippedDate | ShipVia | Freight | ShipName | ShipAddress | ShipCity | ShipRegion | ShipPostalCode | ShipCountry | OrderID | ProductID | UnitPrice | Quantity | Discount |
|---|---|---|---|---|---|---|---|---|---|---|---|---|---|---|---|---|---|---|
| 10248 | VINET | 5 | 1996-07-04 | 1996-08-01 | 1996-07-16 | 3 | 32.38 | Vins et alcools Chevalier | 59 rue de l’Abbaye | Reims | 51100 | France | 10248 | 11 | 14 | 12 | 0 | |
| 10248 | VINET | 5 | 1996-07-04 | 1996-08-01 | 1996-07-16 | 3 | 32.38 | Vins et alcools Chevalier | 59 rue de l’Abbaye | Reims | 51100 | France | 10248 | 42 | 9.8 | 10 | 0 |
Then we have the employees.csv file:
| EmployeeID | LastName | FirstName | Title | TitleOfCourtesy | BirthDate | HireDate | Address | City | Region | PostalCode | Country | HomePhone | Extension | Photo | Notes | ReportsTo | PhotoPath |
|---|---|---|---|---|---|---|---|---|---|---|---|---|---|---|---|---|---|
| 1 | Davolio | Nancy | Sales Representative | Ms. | 1948-12-08 | 1992-05-01 | 507 - 20th Ave. E.\nApt. 2A | Seattle | WA | 98122 | USA | (206) 555-9857 | 5467 | \x | “Education includes a BA in (…)” | 2 | http://accweb/emmployees/davolio.bmp |
| 2 | Fuller | Andrew | “Vice President, Sales” | Dr. | 1952-02-19 | 1992-08-14 | 908 W. Capital Way | Tacoma | WA | 98401 | USA | (206) 555-9482 | 3457 | \x | “Andrew received his BTS commercial (…)” | http://accweb/emmployees/fuller.bmp |


We will limit this example to just these two entities () and the relationship between them.
Prepare your CSV data
In order to import it into Neo4j, we have to prepare the headers in a Neo4j-compliant fashion. From the two CSV files, we will need three separate ones.
We have the orders_prepared.csv file:
| OrderID:ID | OrderDate:DATE | RequiredDate:DATE | ShippedDate:DATE | ShipVia:INTEGER | Freight:FLOAT | ShipName:STRING | ShipAddress:STRING | ShipCity:STRING | ShipRegion:STRING | ShipPostalCode:INTEGER | ShipCountry:STRING | UnitPrice:FLOAT | Quantity:INTEGER | Discount:FLOAT |
|---|---|---|---|---|---|---|---|---|---|---|---|---|---|---|
| 10248 | 1996-07-04 | 1996-08-01 | 1996-07-16 | 3 | 32.38 | Vins et alcools Chevalier | 59 rue de l’Abbaye | Reims | 51100 | France | 14 | 12 | 0 | |
| 10248 | 1996-07-04 | 1996-08-01 | 1996-07-16 | 3 | 32.38 | Vins et alcools Chevalier | 59 rue de l’Abbaye | Reims | 51100 | France | 9.8 | 10 | 0 |
Then we have the employees_prepared.csv file:
| EmployeeID:ID | LastName:STRING | FirstName:STRING | Title:STRING | TitleOfCourtesy:STRING | BirthDate:DATE | HireDate:DATE | Address:STRING | City:STRING | Region:STRING | PostalCode:INTEGER | Country:STRING | HomePhone:STRING | Extension:IGNORE | Photo:IGNORE | Notes:IGNORE | PhotoPath:IGNORE |
|---|---|---|---|---|---|---|---|---|---|---|---|---|---|---|---|---|
| 1 | Davolio | Nancy | Sales Representative | Ms. | 1948-12-08 | 1992-05-01 | 507 - 20th Ave. E.\nApt. 2A | Seattle | WA | 98122 | USA | (206) 555-9857 | 5467 | \x | “Education includes a BA in (…)” | http://accweb/emmployees/davolio.bmp |
| 2 | Fuller | Andrew | “Vice President, Sales” | Dr. | 1952-02-19 | 1992-08-14 | 908 W. Capital Way | Tacoma | WA | 98401 | USA | (206) 555-9482 | 3457 | \x | “Andrew received his BTS commercial (…)” | http://accweb/emmployees/fuller.bmp |
Finally, we have the brand new sold_prepared.csv file:
| :START_ID(Order) | :START_ID(Employee) |
|---|---|
| 10248 | 1 |
| 10248 | 2 |
What do these new headers mean? Briefly, the column names are used for property names of the nodes (Order and Employee) and relationship (SOLD) we want to create. There is specific markup on specific columns:
:ID- global id column used to look up the node later reconnecting- if you have repeated IDs across entities, you have to provide the entity (id-group) in parentheses like
:ID(Order) - if your IDs are globally unique, you can leave that off
- if you have repeated IDs across entities, you have to provide the entity (id-group) in parentheses like
:LABEL- label column for nodes. Multiple labels can be separated by a delimiter:START_ID,:END_ID- relationship file columns referring to the node ids. For id-groups, use:END_ID(Order):TYPE- column to specify relationship-type- All other columns are treated as properties but skipped if empty or annotated with
:IGNORE. - Type conversion is possible by suffixing the name with type indicators like
:INTEGERand:FLOAT(subtypes of the abstract typeNUMBER):STRING:BOOLEAN- The spatial type
:POINT - Temporal types:
:DATE,:TIME,:LOCALTIME,:DATETIME,:LOCALDATETIMEand:DURATION
Note - These are the timestamp formats for Cypher:
RETURN DATE("2019-06-01")
RETURN TIME("18:40:32.142+0100")
RETURN DATETIME("2019-06-01T18:40:32.142+0100")
The Neo4j Docker Image
Neo4j provides and maintains official Neo4j Docker images on DockerHub for both Neo4j Community and Enterprise editions (we’re interested in the first one). There are several ways to leverage Docker for your Neo4j development and deployment. You can create throw-away Neo4j instances of many different versions for testing and running your applications. You can also pre-seed containers with datasets, extensions, and configurations for interaction and processing. Here, we want to perform two steps on our local machine:
- Import data into the default database, called
neo4j(the only one provided by the Community edition) with an interactive run of the container executingneo4j-admin import, storing database files on persistent Docker volumes - Launch the server in a detached run, exposing both the server and the web client on two ports of the local machine
To download the image, we just need to execute docker pull neo4j with the desired tag:
docker pull:4.3.1-communityWe will use three Docker persistent volumes:
neo4j-datato store our database filesneo4j-importto store our CSV filesneo4j-pluginsto store the plugins we need
Import data
In your Docker volume folder /neo4j-import/_data, create a csv_files folder in which to store your data:
neo4j-import/_data/
└── csv_files/
    ├── orders_prepared.csv
    ├── employees_prepared.csv
    └── sold_prepared.csv
Then, import data into the default database with an interactive run of the container executing neo4j-admin import, storing database files on the docker volume neo4j-data:
docker run --interactive --tty --rm \
    --env=NEO4J_AUTH=neo4j/<YOUR_PASSWORD> \
    --env=NEO4JLABS_PLUGINS='["apoc", "graph-data-science", "n10s"]' \
    --volume=neo4j-data:/data \
    --volume=neo4j-import:/var/lib/neo4j/import \
    --volume=neo4j-plugins:/plugins \
    --name=neo4j-server \
    neo4j:4.3.1-community \
bin/neo4j-admin import \
--database=neo4j \
--skip-bad-relationships \
--nodes=Order=import/csv_files/orders_prepared.csv \
--nodes=Employee=import/csv_files/employees_prepared.csv \
--relationships=SOLD=import/csv_files/sold_prepared.csv \
What do all these parameters mean?
docker runoptions:--interactivekeeps STDIN open even if not attached--ttyallocates a pseudo-TTY--rmmakes Docker automatically clean up the container and remove the file system when the container exits (by default a container’s file system persists even after the container exits)--envsets an environment variable--volumemounts the volume at a certain location in the container--namegives a name to the container
- environment variables:
NEO4J_AUTH=neo4j/<YOUR_PASSWORD>sets the password for adminneo4jto<YOUR_PASSWORD>NEO4JLABS_PLUGINS='["apoc", "graph-data-science", "n10s"]'contains the plugins we want to install (these three are the most useful and they do not require a manual installation)
neo4j-importoptions:--database=neo4jsets the database where we will import our data (the defaultneo4jone in our case, since we are using the Community edition)--skip-bad-relationshipsallows silent removal of bad relationships, i.e., relationships that refer to missing node IDs, either for:START_IDor:END_ID(normally, any bad relationship is considered an error and will fail the import)--nodes=Order=import/csv_files/orders_prepared.csvspecifies the file from whichOrdernodes are imported--nodes=Employee=import/csv_files/employees_prepared.csvspecifies the file from whichEmployeenodes are imported--relationships=SOLD=import/csv_files/sold_prepared.csvspecifies the file from whichSOLDrelationships are imported
Launch the server
Now we finally have our data imported into our Docker persistent volume neo4j-data. We can now start the container with the following command:
docker run -d --restart always \
    --env=NEO4J_AUTH=neo4j/<YOUR_PASSWORD> \
    --env=NEO4JLABS_PLUGINS='["apoc","graph-data-science", "n10s"]' \
    --env=NEO4J_dbms_connector_http_listen__address=:6476 \
    --env=NEO4J_dbms_connector_https_listen__address=:6477 \
    --env=NEO4J_dbms_connector_bolt_listen__address=:7687 \
    --env=NEO4J_dbms_connector_http_advertised__address=:6476 \
    --env=NEO4J_dbms_connector_https_advertised__address=:6477 \
    --env=NEO4J_dbms_connector_bolt_advertised__address=:7687 \
    --env=NEO4J_dbms_security_procedures_unrestricted=gds.*,apoc.* \
    --env=NEO4J_dbms_security_procedures_allowlist=gds.*,apoc.* \
    --publish=<HTTP_PORT>:6476 \
    --publish=<HTTPS_PORT>:6477 \
    --publish=<BOLT_PORT>:7687 \
    --volume=neo4j-data:/data \
    --volume=neo4j-import:/var/lib/neo4j/import \
    --volume=neo4j-plugins:/plugins \
    --name=neo4j-server \
    neo4j:4.3.1-community
What do all these parameters mean?
docker runoptions:--publishbinds the “right” port of the container to the “left” TCP port of the host machine.
- environment variables:
NEO4J_AUTH=neo4j/<YOUR_PASSWORD>sets the password for adminneo4jto<YOUR_PASSWORD>NEO4JLABS_PLUGINS='["apoc","graph-data-science", "n10s"]'specifies the plugins we want to use
neo4j-importoptions:NEO4J_dbms_connector_http_listen__address=:6476andNEO4J_dbms_connector_http_advertised__address=:6476specify the HTTP listen port for incoming connectionsNEO4J_dbms_connector_https_listen__address=:6477andNEO4J_dbms_connector_https_advertised__address=:6477specify the HTTPS listen port for incoming connectionsNEO4J_dbms_connector_bolt_listen__address=:7687andNEO4J_dbms_connector_bolt_advertised__address=:7687specify the Bolt listen port for incoming connectionsNEO4J_dbms_security_procedures_unrestricted=gds.*,apoc.*allows for all graph-data-science and APOC procedures (from the plugins we installed) to be available to all usersNEO4J_dbms_security_procedures_allowlist=gds.*,apoc.*names certain procedures that should be available from a library (see here)
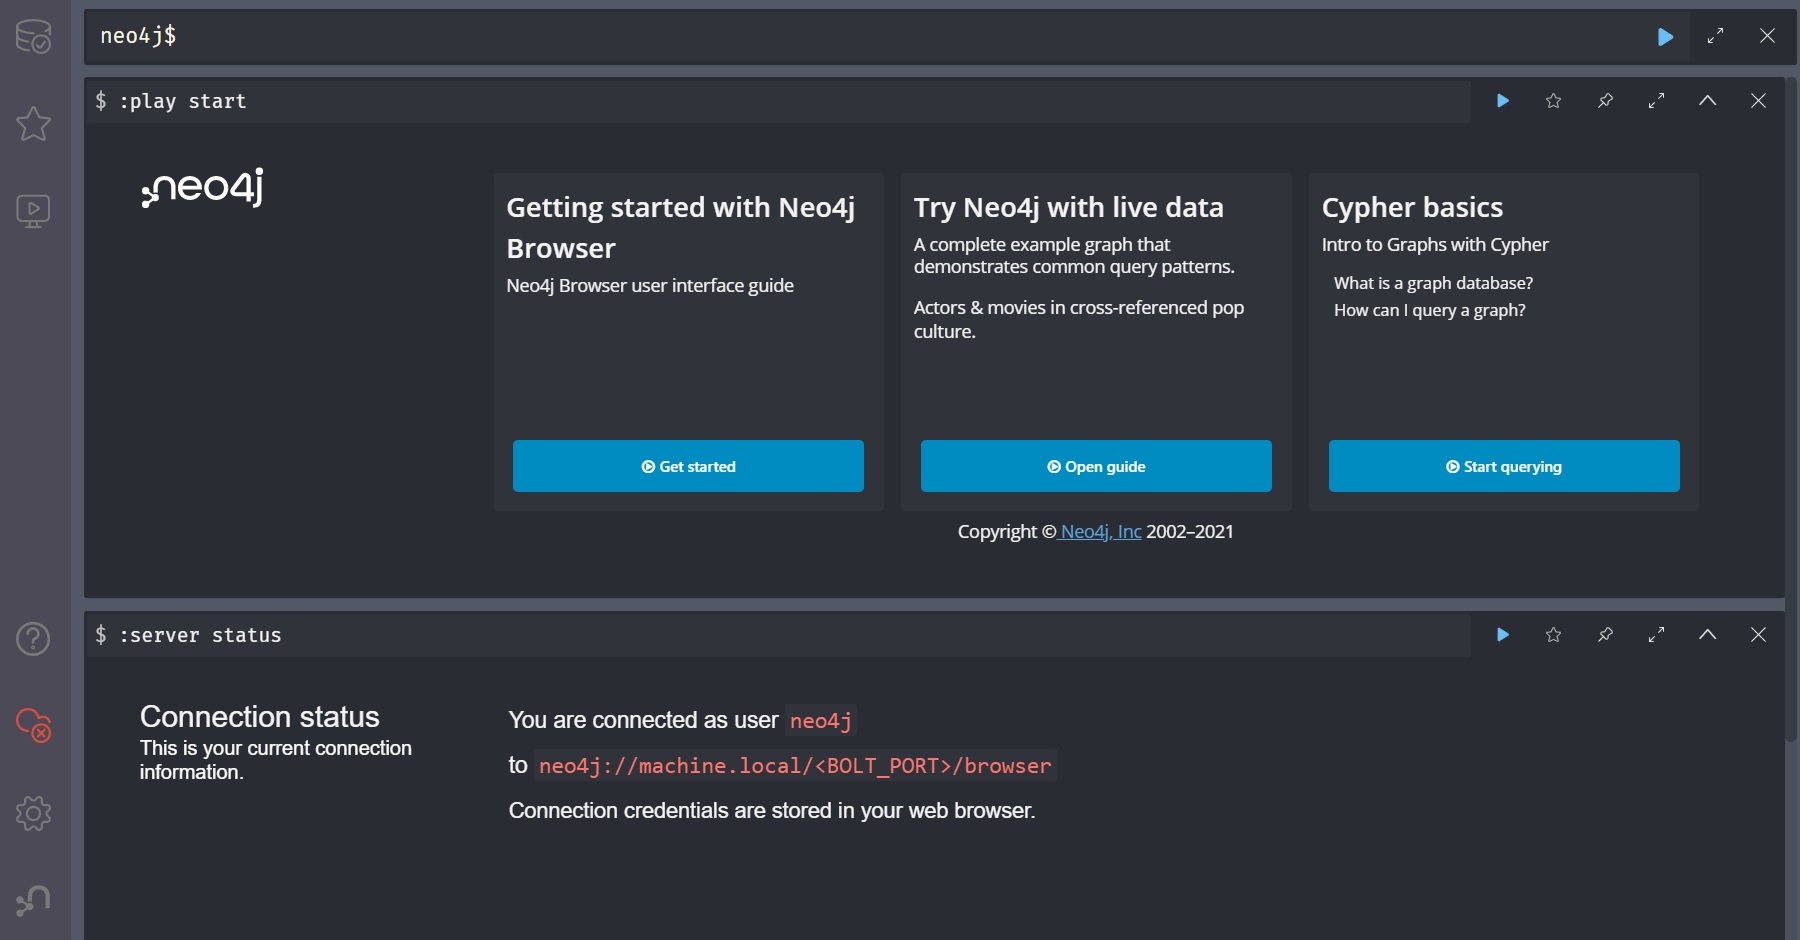
Now, at machine.local/<HTTP_PORT>/browser we can access the Neo4j Browser WebUI:
Upgrade to Neo4j Enterprise & Bloom
If you want to use the enterprise version with Neo4j Bloom (neither is available for free), you need the neo4j:4.3.1-enterprise Docker image and a valid activation key for the Bloom server. Then, proceed with the following steps:
- download the Bloom server package
- unzip the downloaded package and place the
4.x.jarfile into theneo4j-pluginsdocker volume - create a new
neo4j-licensesvolume and place yourbloom.licensefile in it - now you are ready to start the server:
    docker run -d --restart always \
      --env NEO4J_ACCEPT_LICENSE_AGREEMENT=yes \
      --env=NEO4J_AUTH=neo4j/<YOUR_PASSWORD> \
      --env=NEO4JLABS_PLUGINS='["apoc","bloom","graph-data-science","n10s"]' \
      --env=NEO4J_dbms_connector_http_listen__address=:6476 \
      --env=NEO4J_dbms_connector_https_listen__address=:6477 \
      --env=NEO4J_dbms_connector_bolt_listen__address=:7687 \
      --env=NEO4J_dbms_connector_http_advertised__address=:6476 \
      --env=NEO4J_dbms_connector_https_advertised__address=:6477 \
      --env=NEO4J_dbms_connector_bolt_advertised__address=:7687 \
      --env=NEO4J_dbms_security_procedures_unrestricted=gds.*,apoc.*,bloom.* \
      --env=NEO4J_dbms_security_procedures_allowlist=gds.*,apoc.*,bloom \
      --env=NEO4J_dbms_unmanaged__extension__classes=com.neo4j.bloom.server=/browser/bloom \
      --env=NEO4J_neo4j_bloom_license__file=/licenses/bloom.license \
      --publish=<HTTP_PORT>:6476 \
      --publish=<HTTPS_PORT>:6477 \
      --publish=<BOLT_PORT>:7687 \
      --volume=neo4j-data:/data \
      --volume=neo4j-import:/var/lib/neo4j/import \
      --volume=neo4j-licenses:/licenses \
      --volume=neo4j-plugins:/plugins \
      --name=neo4j-server \
      neo4j:4.3.0-enterprise